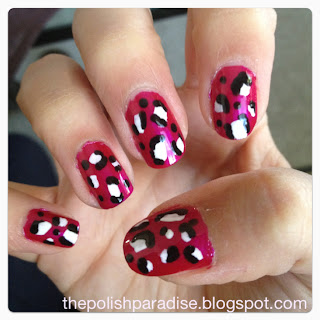
So here is how to do it......
First of all, I'd like to point out that I don't like the colors that I used in this tutorial. I was hoping dark pink and white would look a lot different than how it ended up but ANYWAYS, you'll get the gist of the design!
First start out by painting your base coat and two coats of your desired color. After this color choice, I suggest using a lighter and darker version of the same or a similar color. For example baby blue with dark blue spots or gold with bronze spots. Once your nails are completely dry paint irregular shaped spots and blobs. I suggest doing about three or four per nail unless you use a lot of tiny spots. When you paint this, make sure there is as little polish on the brush as possible so that it dries faster.
Next, using a pen (as mentioned in my first post), dip the tip in black nail polish and outline your blobs and spots with "u" and "c" shapes. Add polka dots in slightly large empty spaces. Be sure to use a top coat and you're done!
Practice makes perfect!
I suggest practicing your nail designs on ziplock bags or sandwich bags so that you get comfortable with your design before they go on your nails. Make sure to practice using BOTH hands to prevent messes on your nails! This tip will save you a lot of time, I promise! Here's a picture of my first attempts with leopard prints on a plastic sandwich bag!


No comments:
Post a Comment
All comments are appreciated and welcomed!